Physical Address
304 North Cardinal St.
Dorchester Center, MA 02124
Physical Address
304 North Cardinal St.
Dorchester Center, MA 02124


Hello developers, today we are going to create a Chrome extension. It’s simpler than it seems. Depending on the complexity required, it’s enough to have some basic knowledge of HTML, CSS, and JavaScript and we can implement whatever we want and have that tool at hand whenever we are browsing the internet. You can find this video tutorial on my channel.
Let’s get creative, I need an extension that generates QR codes from the URL where we are, allows us to modify it, and a button to download this image. A very useful tool that serves us perfectly to illustrate how to program an extension.
The manifest is the most important file that a Chrome extension has. In it, we will provide information regarding the name of our application, the version, and the path of our different scripts.

In the manifest file, we also specify the path to our icon, (which must be a .png file)
Basically, we need to have within a directory, this manifest file and the other scripts. In my case, being a bit of a geek about organization, I’ve organized everything into directories:
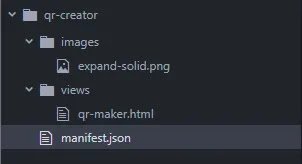
I have a directory called views and inside it there will be an HTML file. In this case, we’ll name it ‘qr-maker.html’, but it can be named whatever we want. In the ‘images’ directory, we’ll place the icon of my application. We’ll add a few more directories that we’ll use later on, such as js, css, and packages. Our HTML file will look like this:
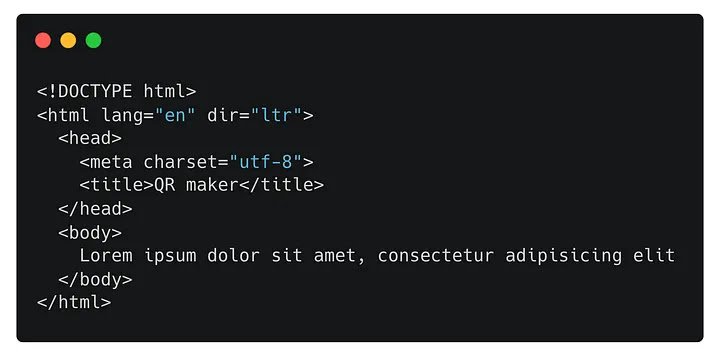
We only have the basic structure of an HTML file, with a small text in the body. We already have a fully functional extension, let’s load it into Chrome.
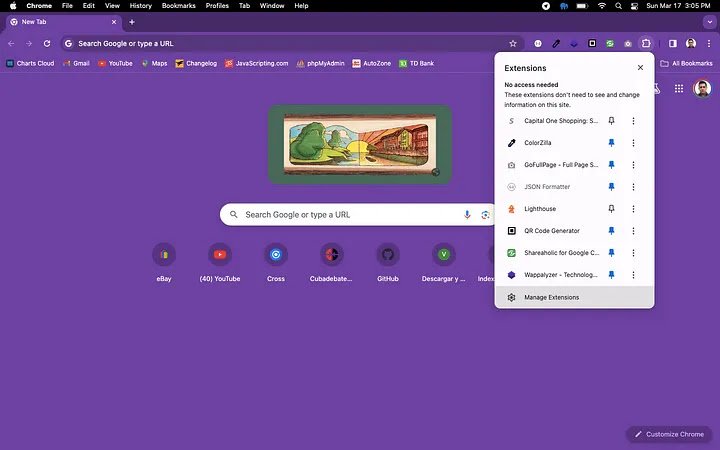
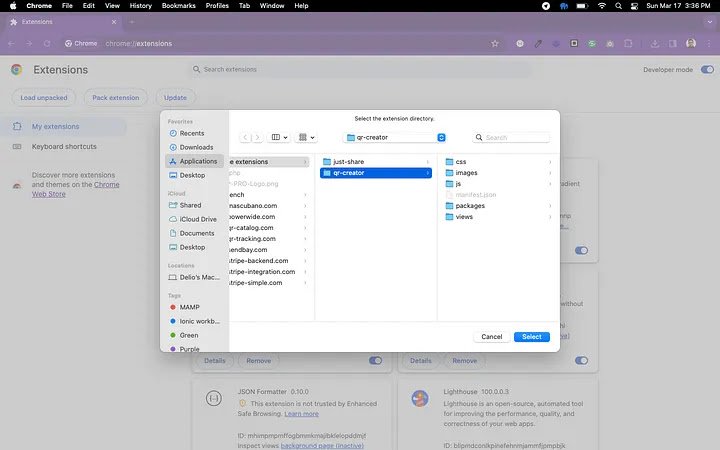
We must search for the extension management in Chrome, or go directly to chrome://extensions/
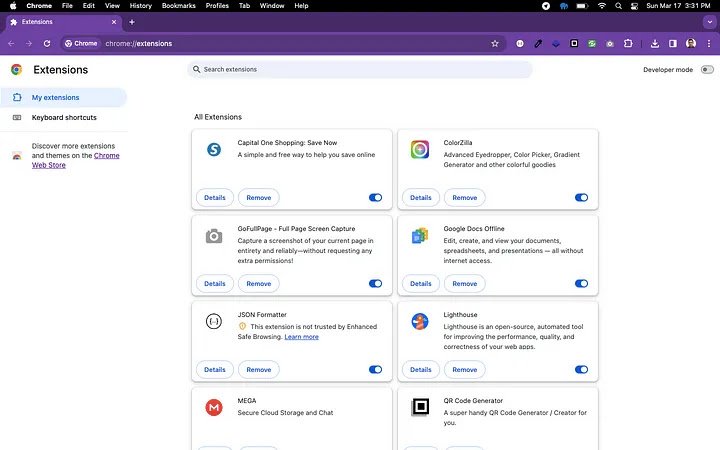
We must activate developer mode, which is located at the top right, and Chrome will show us a series of new buttons on the left. Load unpacked, pack extension y update.
We choose Load unpacked, and a dialog box will appear for us to select the path where we have our project on our hard drive.
We click on Select, and it will load our extension in Chrome. Then, we click on Details, and we can pin the extension to our toolbar. We now have our extension running in Chrome, displaying its icon and other information written in the manifest.
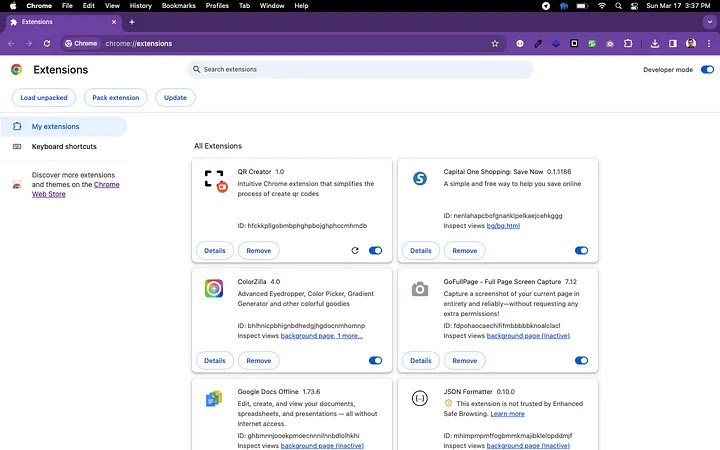
Once pinned to our toolbar, we can click on it and see what our extension does.
Done, the text is being displayed. But this is not very useful. I need a library to generate QR codes. In this case, we will use qrcode.js. It will be sufficient to create our tool.
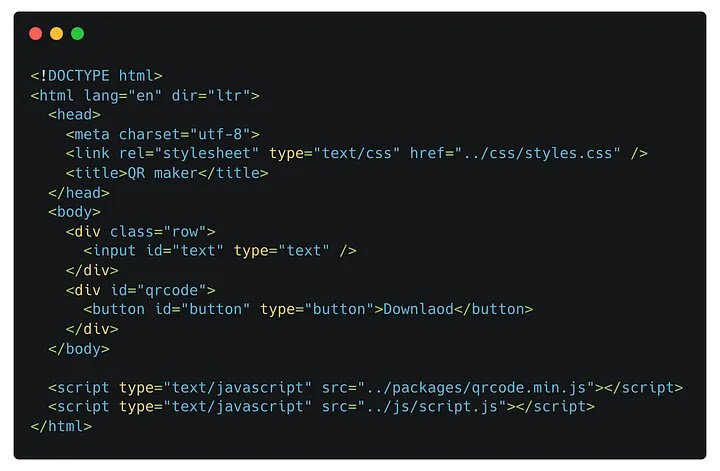
Download the compressed package and we only need the qrcode.min.js file. We will place this file in the packages directory within our project and call it from the qr-maker.html page. Created a new .js file where we will program our extension. We will place it within the js directory and call it script.js. We start implementing our code in the qr-maker.html page, and it would look like this:
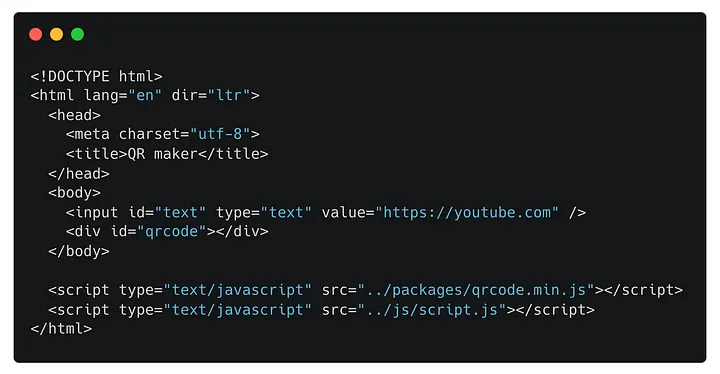
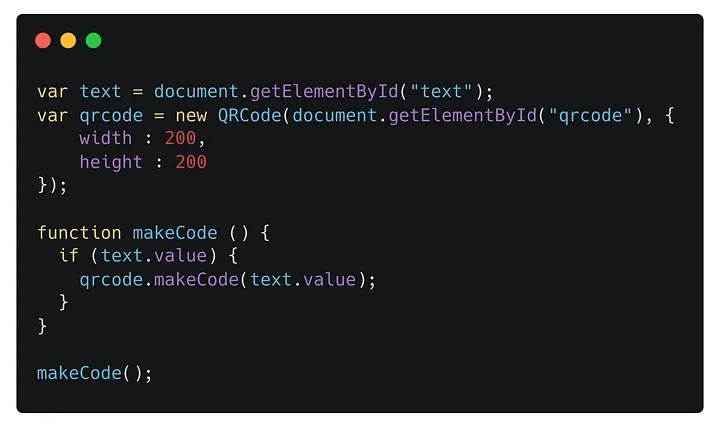
We have only added an input and a layer inside the body of our page. Additionally, we have called the qrcode.min.js library and the script we have created, which is located within the js directory. The programming of script.js would look like this:
Now we can reload our extension and see the result of our work.
At the moment, the extension generates QR codes, but I need it to be dynamic, and it needs some love; it looks horrible. Let’s give it some style with CSS. We create a file named styles.css and call it from our qr-maker.html page.
<link rel="stylesheet" type="text/css" href="../css/styles.css" />
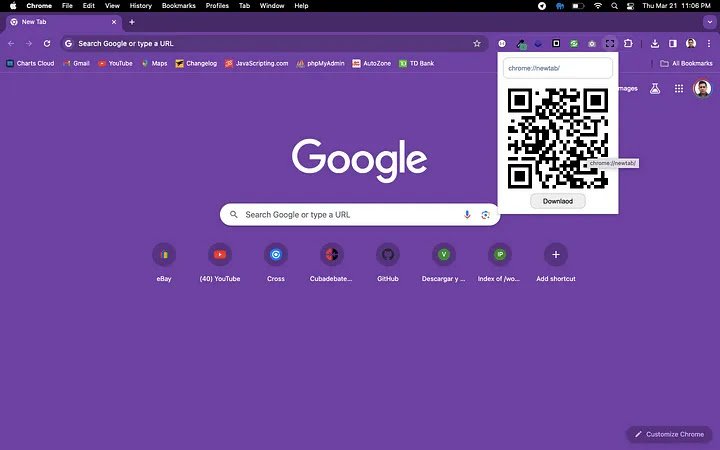
Now it looks like a real extension:
Now we just need to make it dynamic. I need the text I type into the text field to be converted into a QR code. Also, I want it to default to showing the URL of the active tab, and of course, a button to download our generated QR code. Let’s go step by step.
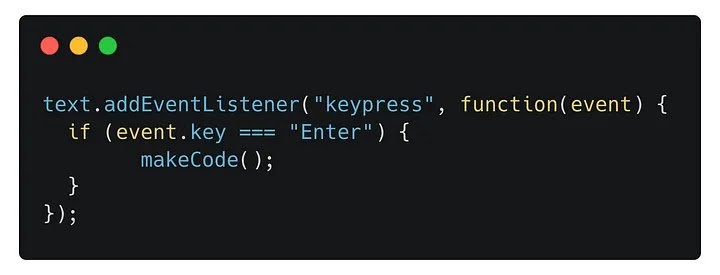
We add this piece of code to listen for when a key is pressed in the input, then we check if it’s the ENTER key and execute the makeCode function. There you go, now we make dynamic QR codes.”
Now I want the URL of the active tab to appear by default in the input. To do this, we need to modify the manifest and add a line of code:
"permissions": ["activeTab"],This instruction written in the manifest allows access to functions and methods of the tabs class. Our file would look like this:

Now we add this piece of code:
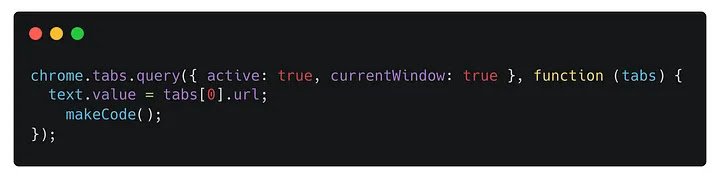
And now we’re reading the URL of the active tab. We could read more things, like the favicon of the page, title, etc., but for now, we only need the URL. Perhaps we should refresh the extension from chrome://extensions/
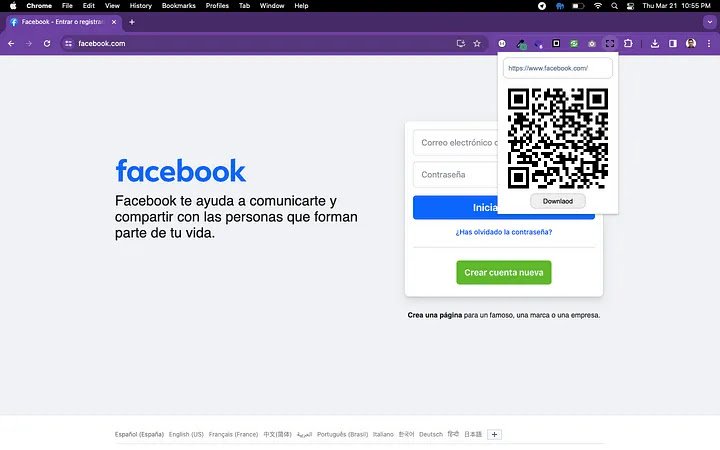
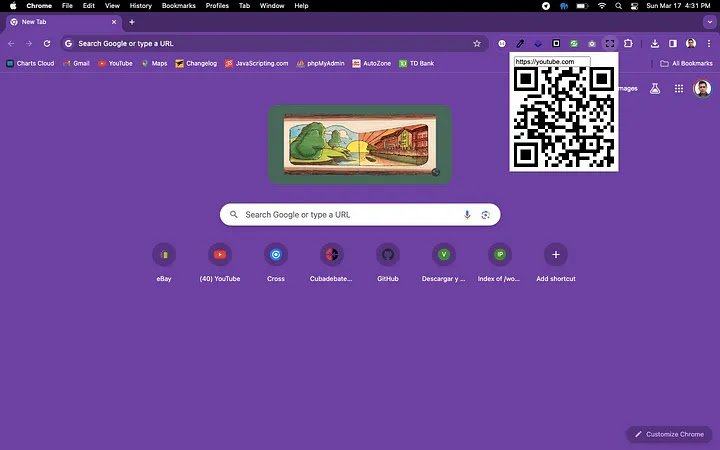
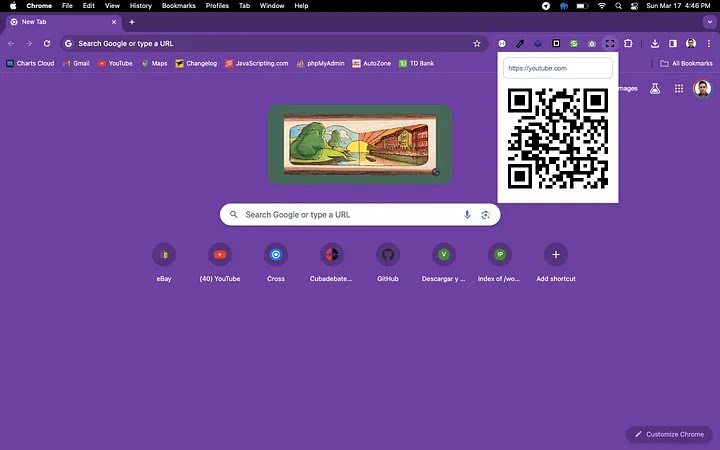
Ready, now the text field is displaying the active URL and converting it into a QR code. The next step is to program the button to download the image to our hard drive. Here’s how our HTML file would look like:
We add some more classes in the .css file.
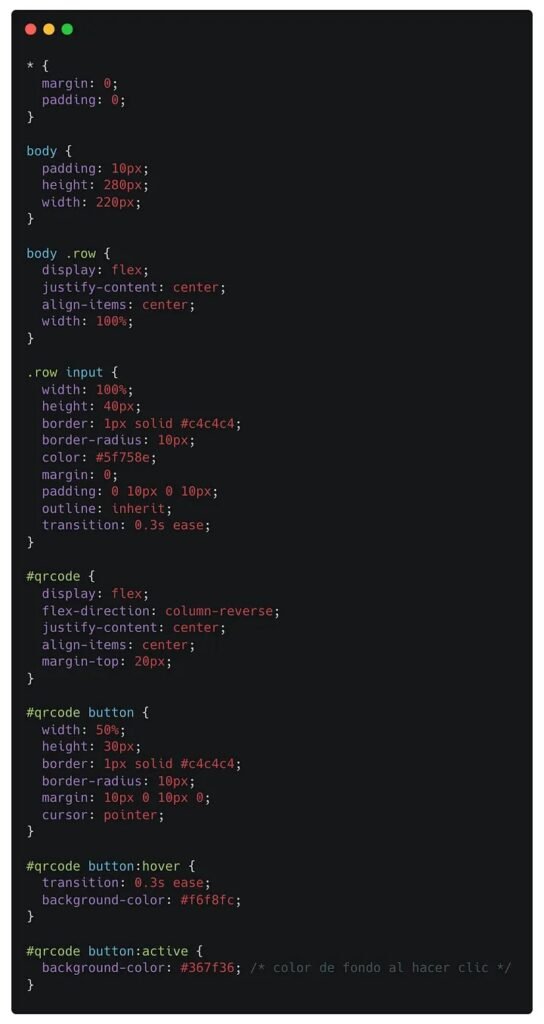
And it looks like this:
We just need to program the button and we’re done. Here’s how our JavaScript file would look like:
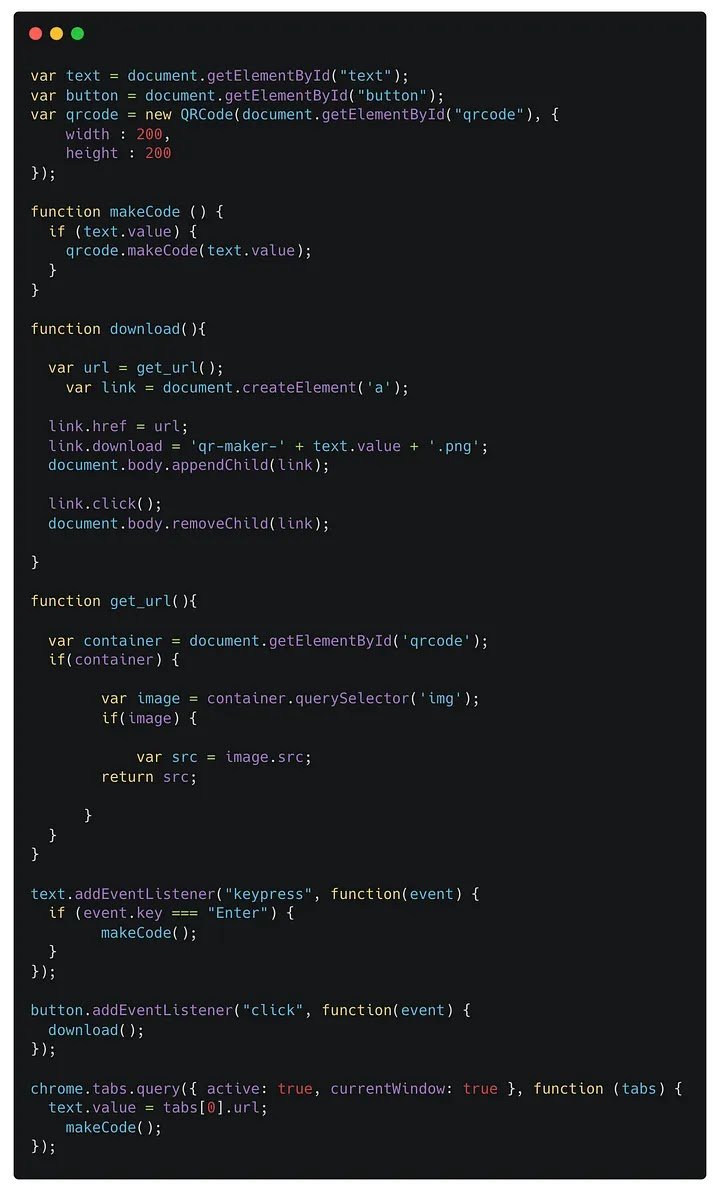
Basically, we start listening for click events on the button until it’s clicked, and then we execute the download() function. Let’s explain a bit how it works. The qrcode.js library generates an image encoded in base64. So, what we need to do to download that image is to find within the qrcode tag the img element, and once we find it, read the src property. Then, we create a link and assign the path of that image to it.
And that’s all, developers. See you soon with another tutorial.